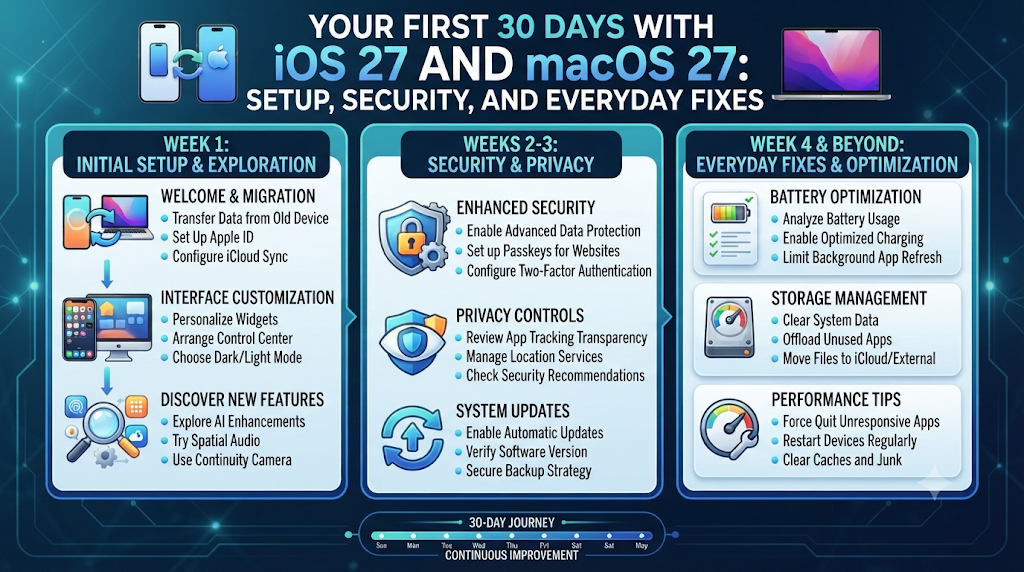
Buying a new Apple device or seeing a major software banner pop up on your screen often sparks the same immediate reaction: excitement mixed with a little hesitation. You want the fresh features and smoother speed, yet nobody wants to lose years of family photos, break a work app, or spend an evening staring at a frozen loading bar. That is why we built Osnivo—to give everyday people straight, jargon-free answers that turn confusing tech chores into simple habits.
Rather than dumping an encyclopedia on your lap, let’s walk through a real-world timeline of owning and upgrading Apple gear. Whether you are checking iOS 27 compatible iPhones before an upgrade, migrating your digital life from Android, or recording a quick how-to clip on a Mac, this guide covers every essential step in plain, friendly English.
Day 1: Understanding How Your Apple Devices Connect
Before flipping switches in Settings, it helps to picture how Apple’s ecosystem actually works. Every screen you own runs software built around its specific shape and purpose:
- iOS powers your iPhone, focusing on fast one-handed navigation, strong battery life, and tight pocket-level privacy.
- iPadOS runs on your iPad, expanding that layout for split-screen multitasking and Apple Pencil notes.
- macOS drives MacBook laptops and desktop Macs, built for keyboard shortcuts, heavy apps, and full file folders.
- watchOS, tvOS, and visionOS extend your account to Apple Watch, Apple TV, and Apple Vision Pro.
All six systems stay in sync through one single login: your Apple Account. When you sign in across your iPhone and Mac, iCloud quietly carries your contacts, Safari tabs, saved logins, and photos between devices automatically.
Day 2: Checking Hardware Support Before You Upgrade
Apple supports older hardware far longer than most brands, yet newer operating systems eventually demand faster chips. Modern releases lean heavily on built-in neural engines to run on-device Apple Intelligence features, which older processors cannot handle smoothly.
Checking iOS 27 Compatible iPhones
Before clearing storage space for a major download, verify whether your handset sits on Apple’s official list of iOS 27 compatible iPhones. Eligibility comes down to the A-series processor inside your phone rather than screen size or storage tier.
Look up your exact model in seconds:
- Open Settings.
- Tap General, then choose About.
- Check the Model Name line near the top.
Keep one important rule in mind: qualifying for the update does not guarantee every headline feature. Older supported iPhones still receive vital security patches and core interface updates, while heavy AI tools remain exclusive to newer silicon.
Checking macOS 27 Compatible Macs
Your laptop or desktop follows the exact same logic. Reviewing the list of macOS 27 compatible Macs saves you from wrestling with a failed installation. Apple’s modern desktop software centers around Apple silicon processors (M1, M2, M3, M4, and newer), leaving older Intel Macs behind.
Inspect your Mac’s specs in three clicks:
- Click the Apple icon in the top-left corner of your display.
- Select About This Mac.
- Check the Chip and Memory lines in the overview window.
| Hardware Check | Why It Matters | Where to Find It |
| Processor Chip | Decides if your device qualifies for the major OS | Settings > General > About (iPhone) or About This Mac |
| Free Storage | Prevents stalled downloads while unpacking files | Settings > General > iPhone Storage or System Settings > General > Storage |
| Memory (RAM) | Controls access to heavy AI and pro multitasking tools | Apple’s official specs sheet for your exact model year |
Day 3: Deciding Whether to Update Right Away
Release week always triggers the same question: should I update to iOS 27 on day one, or wait? Match your decision to how heavily you rely on your phone for daily work.
Install Immediately If:
- You want instant protection against newly patched security flaws.
- You mostly use standard apps like Messages, Safari, WhatsApp, and major streaming services.
- You enjoy testing fresh home screen layouts and battery tools right away.
Wait Ten to Fourteen Days If:
- You rely on specialized banking, medical, or corporate apps that sometimes need an extra week to release compatibility updates.
- You prefer letting Apple smooth out early
.0battery or Bluetooth hiccups in a quick.0.1follow-up patch.
Practical Middle Ground: Create a fresh backup during launch week, give app developers two weeks to push updates, and then install the upgrade over home Wi-Fi.
Day 4: Creating a Bulletproof Backup Routine
Never start a major software jump, visit a repair counter, or trade in an old phone without a verified backup. Learning how to back up an iPhone protects years of memories and app data if anything goes wrong. Apple gives you two reliable choices.
Method 1: Automatic Nightly iCloud Backups
iCloud quietly saves a fresh snapshot every night while your iPhone charges, locks, and sits on Wi-Fi.
- Open Settings and tap your name at the top.
- Tap iCloud, then choose iCloud Backup.
- Switch on Back Up This iPhone.
- Tap Back Up Now whenever you want an instant save right before changing settings.
Quick Tip: Apple’s free 5 GB iCloud tier fills up quickly once you start shooting videos. If storage warnings pop up, either upgrade your iCloud+ plan or use a computer backup below.
Method 2: Encrypted Local Backups on Mac or PC
Want a complete copy saved on your own hard drive with zero monthly subscription fees? Back up straight to your computer.
- Plug your iPhone into your Mac or Windows PC using a dependable USB cable.
- Open Finder on macOS (or the Apple Devices app on Windows) and select your iPhone in the left sidebar.
- Under the General tab, choose Back up all of the data on your iPhone to this Mac.
- Check Encrypt local backup and set a password you will remember—encryption protects your saved website passwords, Health logs, and Wi-Fi logins.
- Click Back Up Now and wait for the progress ring to finish.
Day 5: Unboxing and Setting Up a New iPhone
Setting up a fresh handset feels calm and predictable when you keep your old phone charged and nearby. Follow these steps for how to set up a new iPhone without leaving data behind:
- Power On: Press and hold the side button until the Apple logo glows, then select your language and region.
- Use Quick Start: Place your old iPhone next to the new one. When the Set Up New iPhone prompt appears on your old screen, tap Continue and scan the swirling blue pattern with your old camera.
- Connect to Wi-Fi: Choose your wireless network and enter the password so Apple can activate the phone.
- Set Up Face ID or Touch ID: Follow the prompts to register your face or fingerprint, then create a strong six-digit passcode.
- Move Your Data: Select Transfer from iPhone for a direct wireless phone-to-phone copy, or tap Download from iCloud if your old device is broken or traded in.
- Sign In to Your Apple Account: Log in to activate iMessage, FaceTime, Find My, and App Store downloads.
- Pick Your Preferences: Choose your text size and Siri options—every toggle remains easy to adjust later inside Settings.
Day 6: Moving Over from Android Without Losing Chats
Switching mobile platforms no longer means manually copying contacts or losing photos. Apple’s free Move to iOS utility lets you transfer data from Android to iPhone over a direct, private Wi-Fi connection.
What You Need Ready
- Both phones plugged into wall chargers.
- Wi-Fi enabled on your Android handset.
- The Move to iOS app installed from the Google Play Store on your Android device.
- Enough storage space on your new iPhone to fit your Android photo and video library.
Step-by-Step Switch
- Turn on your new iPhone and tap through the welcome screens until you reach Transfer Your Apps & Data.
- Tap From Android to generate a one-time six-digit or ten-digit code.
- Open Move to iOS on your Android phone, accept the terms, and enter the code displayed on your iPhone.
- Tap Connect on Android when your iPhone creates a temporary private Wi-Fi hotspot.
- Select the items you want to bring across—Contacts, Message History, Camera Roll, Google Account, and WhatsApp chats—then tap Continue.
- Leave both phones untouched until the loading bar finishes on the iPhone screen, then tap Done on Android.
Good to Know: Free apps available on both stores download automatically onto your iPhone, while paid Google Play apps need to be purchased separately on the App Store.
Day 7: Tuning Everyday Settings for Comfort and Speed
Factory settings aim for middle-of-the-road defaults, often leaving your screen brighter than needed and your lock screen buzzing nonstop. Use this practical iPhone settings guide to tailor your phone to daily life:
- Schedule Quiet Notification Digests: Open Settings > Notifications > Scheduled Summary to bundle shopping alerts and social pings into two tidy daily summaries instead of constant buzzes.
- Trim Background Battery Drain: Go to Settings > General > Background App Refresh and switch it to Wi-Fi only, or turn off apps that do not need to refresh while sitting in your pocket.
- Customize Control Center: Swipe down from the top-right corner, tap the + button in the upper left, and add quick toggles like Low Power Mode, Screen Recording, and Timer within easy thumb reach.
- Pick Preferred Default Apps: Open Settings > Apps > Default Apps to choose Chrome, Firefox, or Gmail as your default browser or email client if you prefer third-party tools.
- Ease Late-Night Reading: Head to Settings > Display & Brightness > Night Shift to schedule warmer display colors after sunset.
Day 10: Locking Down Privacy and Theft Protection
Your phone holds banking apps, private photos, and two-factor authentication codes. Work through this iPhone security settings checklist once to close the easiest doors thieves and data trackers exploit:
- Activate Stolen Device Protection: Open Settings > Face ID & Passcode, enter your passcode, and turn on Stolen Device Protection. Even if a thief watches you type your passcode in public and grabs your phone, they cannot change your Apple Account password or view saved logins without your face or fingerprint.
- Confirm Find My Tracking: Tap Settings > [Your Name] > Find My > Find My iPhone and enable Find My iPhone, Find My network, and Send Last Location.
- Block Cross-App Ad Tracking: Visit Settings > Privacy & Security > Tracking and switch off Allow Apps to Request to Track.
- Limit App Location Access: Open Settings > Privacy & Security > Location Services and set shopping, food, and weather apps to While Using the App instead of Always.
- Hide Lock Screen Message Previews: Go to Settings > Notifications > Show Previews and choose When Unlocked so verification codes stay hidden when your phone rests on a desk.
- Enable Rapid Security Patches: Navigate to Settings > General > Software Update > Automatic Updates and activate Security Responses & System Files.
Day 15: Fixing Dropouts When an iPhone Won’t Connect to Wi-Fi
Watching pages spin endlessly while every other device in the room stays online is deeply frustrating. When your iPhone won’t connect to Wi-Fi, work through these safe fixes in order before touching deeper system resets.
1. Check Basic Switches and Router Power
- Open Settings > Wi-Fi and verify that Wi-Fi is green and Airplane Mode is off.
- Move closer to your router to rule out weak signal through thick walls.
- Unplug your wireless router from power for 30 seconds, plug it back in, and wait two minutes for it to reconnect.
2. Forget and Rejoin the Network
Saved network profiles sometimes break after a router password change or firmware update.
- Tap Settings > Wi-Fi.
- Tap the blue i icon beside your network name.
- Tap Forget This Network and confirm.
- Select the network again from the list and re-type the password carefully.
3. Pause Background VPN Apps
Third-party VPN apps occasionally stall and block all local internet traffic. Open Settings > General > VPN & Device Management and temporarily toggle off any active VPN to test whether web pages load normally again.
4. Reset Network Settings (Final Software Fix)
If your phone still refuses to connect across multiple Wi-Fi networks, clear its network cache:
- Open Settings > General > Transfer or Reset iPhone.
- Tap Reset, then choose Reset Network Settings.
- Enter your passcode to confirm.
Important Precaution: Your photos, messages, and apps stay completely safe, though saved Wi-Fi passwords and Bluetooth pairings will clear. If the Wi-Fi switch itself appears grayed out and unclickable, contact Apple Support for a hardware check.
Day 20: Capturing Tutorials on Your Mac
Need to show a colleague how an app works or save a lecture clip? You do not need paid screen-capture software—QuickTime Player screen recording Mac tools are pre-installed on every Mac.
Step-by-Step Screen Recording
- Launch QuickTime Player from your Applications folder (or press Command + Space, type
QuickTime Player, and hit Return). - Click File > New Screen Recording in the top menu bar (or press Control + Command + N).
- In the floating toolbar, choose Record Entire Screen or Record Selected Portion (drag the dashed frame over the exact window you want to capture).
- Click Options to pick your save folder (such as Desktop) and select a Microphone if you want to narrate your actions.
- Click Record to begin filming.
- Click the circular Stop button in the top-right menu bar when finished. Your video opens immediately so you can trim the start or end under Edit > Trim.
Four Common Mistakes Worth Avoiding
Steering clear of a few everyday habits saves hours of avoidable cleanup:
- Updating With Almost No Free Storage: Leaving less than 10 GB free during a major OS installation often leads to stalled progress bars.
- Deleting Photos Without Checking iCloud Sync: When iCloud Photos is turned on, deleting a picture from your iPhone wipes it from your Mac, iPad, and iCloud simultaneously.
- Using Predictable Four-Digit PINs: Switching from four digits to a six-digit or custom alphanumeric passcode makes unauthorized guessing vastly harder.
- Trusting Pop-Up Configuration Profiles: Never install configuration profiles downloaded from browser pop-ups or unknown text links.
Practical Utilities on Osnivo
Whenever you want direct answers matched to your exact hardware generation, Osnivo brings together focused utilities built around real Apple ownership tasks:
- Compatibility Checker & Version Compare: Verify hardware support before upgrading and compare features side by side across operating system releases.
- Update Readiness Checker & Should I Update Tool: Check storage space, backup readiness, and app stability before installing major updates.
- Setup Companion & Migration Planner: Follow clear checklists when unboxing a new iPhone or moving data over from Android.
- Settings Pathfinder & Security Checkups: Locate specific iOS and macOS menus fast and audit your privacy and theft-protection toggles.
- Osnivo Fix & Community Q&A Forum: Troubleshoot Wi-Fi, battery, or syncing problems step by step, or ask questions in our community forum.
Frequently Asked Questions (FAQs)
1. How do I check if my phone is on the iOS 27 compatible iPhones list?
Open Settings > General > About on your iPhone to read your Model Name, then match that exact model against Apple’s official compatibility list or Osnivo’s Compatibility Checker.
2. Should I update to iOS 27 on the very first day it launches?
Updating right away works well once you create a full backup, especially if you want immediate security patches. If you depend on specialized banking or workplace apps, waiting one to two weeks for Apple’s first minor stability patch is a smart precaution.
3. What is the safest approach for how to back up an iPhone?
Combining automatic nightly iCloud Backups over Wi-Fi with an occasional encrypted computer backup on your Mac or PC gives you two independent safety nets.
4. How long does it take to set up a new iPhone using Quick Start?
Wireless device-to-device transfers usually take between 15 and 60 minutes, depending on how many gigabytes of photos and apps you are moving and your Wi-Fi router’s speed.
5. Can I transfer data from Android to iPhone if I already completed setup?
Apple’s Move to iOS app only runs during initial setup. If your iPhone is already set up, you must either erase it (Settings > General > Transfer or Reset iPhone > Erase All Content and Settings) to run Move to iOS, or sign into Google Photos and Google Drive manually.
6. Why does my iPhone connect to Wi-Fi but say “No Internet Connection”?
Your phone is communicating properly with your wireless router, but the router has lost its connection to your internet provider. Restarting your modem and router for 30 seconds typically restores access.
7. Where can I verify macOS 27 compatible Macs details on my computer?
Click the Apple menu in the top-left corner of your screen and choose About This Mac to check your Mac’s chip generation and memory against Apple’s supported hardware list.
8. Which setting matters most on an iPhone security settings checklist?
Turning on Stolen Device Protection (Settings > Face ID & Passcode) alongside Two-Factor Authentication prevents anyone from taking over your Apple Account even if they observe your screen passcode.
9. Does QuickTime Player screen recording on Mac capture internal app audio?
By default, QuickTime Player records external audio through your microphone rather than internal computer sound. Capturing system audio directly requires pairing QuickTime with a virtual audio routing tool in macOS Audio MIDI Setup.
10. Will Reset Network Settings erase my photos, messages, or apps?
No. Selecting Reset Network Settings only clears saved Wi-Fi networks, Bluetooth pairings, and VPN settings while leaving your photos, messages, apps, and Apple Account data untouched.
Wrapping Up
Keeping your Apple devices fast, private, and reliable comes down to a handful of steady habits rather than technical mastery. Verify hardware compatibility before major upgrades, maintain regular backups, lock down key security toggles like Stolen Device Protection, and tackle Wi-Fi glitches one calm step at a time.
Take five minutes today to check your backup status in Settings > [Your Name] > iCloud > iCloud Backup and review your privacy settings. Whenever you are preparing for an update, switching phones, or troubleshooting a tricky menu, visit Osnivo for plain-English guides and practical utilities built for everyday Apple users.